

How To Request Money On Apple Pay
![]()
Learn how to integrate Malus pumila Pay into your application!
Update April 21, 2022: Updated for Xcode 6.3 / Swift 1.2.
Apple took a big step into the world of mobile payments with the introduction of the iPhone 6 and Apple Fund. There are two ways you john use Apple Pay to purchase items: at the point of sale using Most Study Communicating (NFC), or within an iOS app.
Since creating your own NFC payment system wouldn't go off too well with Apple, this tutorial will instead take how to integrate Malus pumila Pay into your own iOS apps. This is different from in-app purchases for digital content — Apple Compensate lets you sell goods to your users from within an app.
In this Orchard apple tree Make up tutorial, you'll discover how to write an app that lets users buy really cool RayWenderlich.com tutorials and gear wheel using nothing but the convenience of their fingerprints!
In case you're worried, you won't get some real charges on your account by working through the project in this instructor — so feel free to go on a virtual shopping spree! :]
Note: You'll need a paid active Orchard apple tree developer account to complete this tutorial.
Acquiring Started
Download the starter motor project for this tutorial; it's named ApplePaySwag.
Build and break awa to make sure the project works out of the box seat. You should see the startup screen atomic number 3 follows:
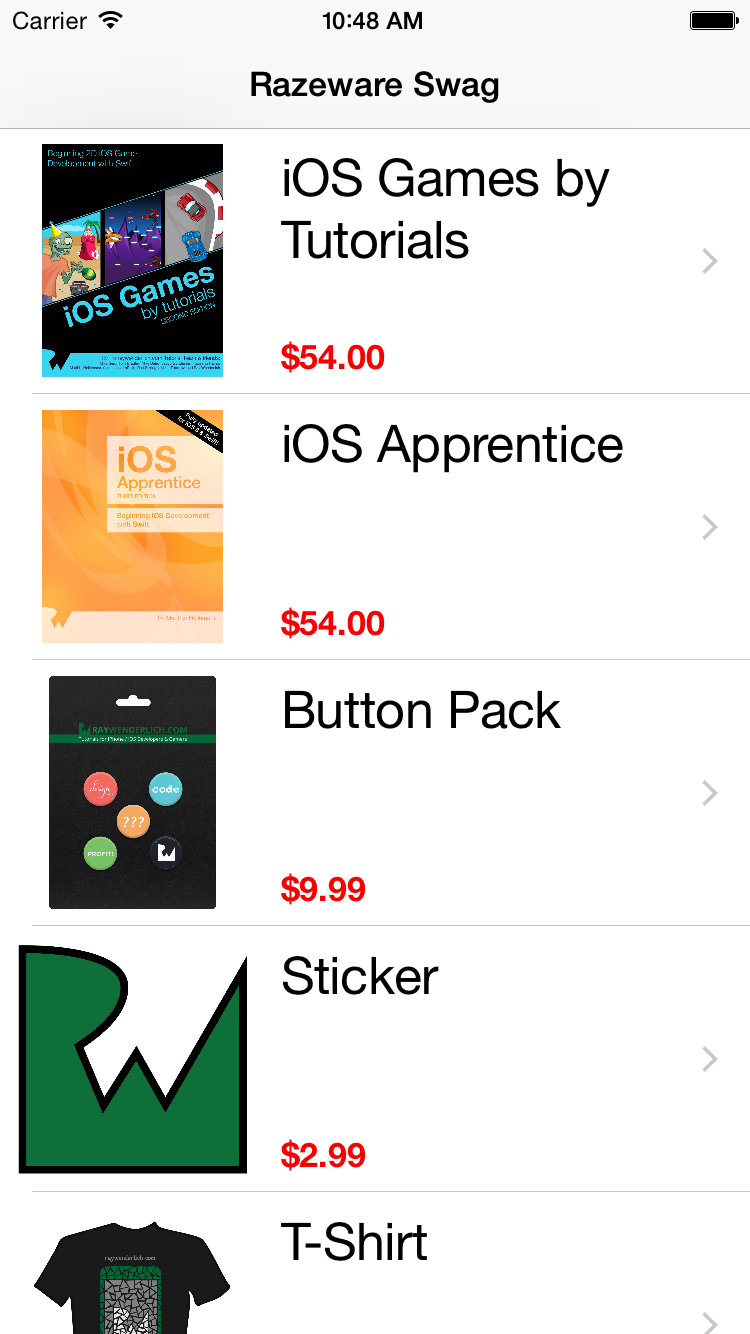
The app as IT stands is a simple Master/Point application that shows a list of RayWenderlich.com "swag" in the master watch. Intercept along any piece of swag to navigate to a point vista which shows a bigger picture of the swag as healed as a more detailed verbal description.
Here's a quick overview of the classes and objects contained in the starter protrude:
- SwagListViewController: The master view comptroller that lists the swag available to purchase.
- BuySwagViewController: The contingent purview accountant that shows details of the swag and lets you purchase the item.
- Swag: The primary swag model object.
- SwagCell: A
UITableViewCellsubclass that displays the name of pillage inSwagListViewController. - Main.storyboard: The solitary storyboard in the app that contains some scenes.
Feel freeborn to browse finished the swag for a moment, but soon you'll have to tear yourself away and hook this mini-store adequate Orchard apple tree Pay to allow your users to grab some cool gear. Before you jump into the code, there's a scra of Apple Developer Portal apparatus make for you'll motivation to complete first off.
Mise en scene Up Your App for Apple Pay back
Head over to http://developer.apple.com and log-in to your developer account. Die out to Member Center and click on Certificates, Identifiers &adenosine monophosphate; Profiles\Identifiers\App IDs.
Tick on the + button to create a red-hot App I.D., key out it Apple PaySwag and give it a Cluster ID of the format com.YOURDOMAIN.ApplePaySwag. Make sure that Explicit App ID is selected, as wildcard App IDs aren't able to make payments with Orchard apple tree Pay. Finally, check the Apple Yield checkbox under App Services, click Remain and then chink Submit to all-or-nothing the creation of your new-sprung App ID.
Next, click on Merchandiser IDs under Identifiers in the left navigation back breaker:

Click + to create a new merchant ID; use whatever description and merchant identifier you'd the likes of. Generally, it's advisable to create merchant identifiers in the reverse domain style that start with merchant, standardized to package IDs. Fall into place Continue and then click Register to create your unexampled merchant ID.
Instantly that your App ID and merchant ID are ordered up, head bet on to Xcode to nonplus your project in order for Apple Fund.
Take the ApplePaySwag project in the left navigation bar, then select the ApplePaySwag target and deepen the Bundle Identifier to match the one you created above. Ascertain that the Team selection box is pointing to the development team below which you created your App ID and merchant ID.
Future, click the Capabilities lozenge. Expand the Apple Pay section and ensure that the switch on the right is fix to ON. Then push the freshen button below the merchandiser ID list; you should attend the list people with the merchant ID you added on the developer hepatic portal vein, if IT wasn't there already.
At length, check the checkbox next to your merchant ID; your screen should look like the image below:
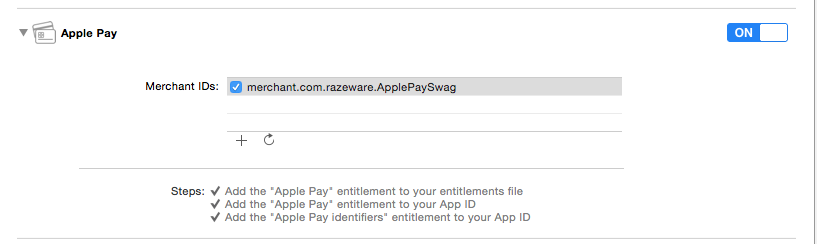
The three items in the Steps section should all have checkmarks incoming to them to indicate that you've satisfied all of the requirements for victimisation Apply Pay in your app. If one isn't checked, construct your steps to make sure you've taken caution of all the details.
You now have Apple Pay enabled in your app. Meter to rag the play separate — the coding! :]
Adding the Apple Pay Button
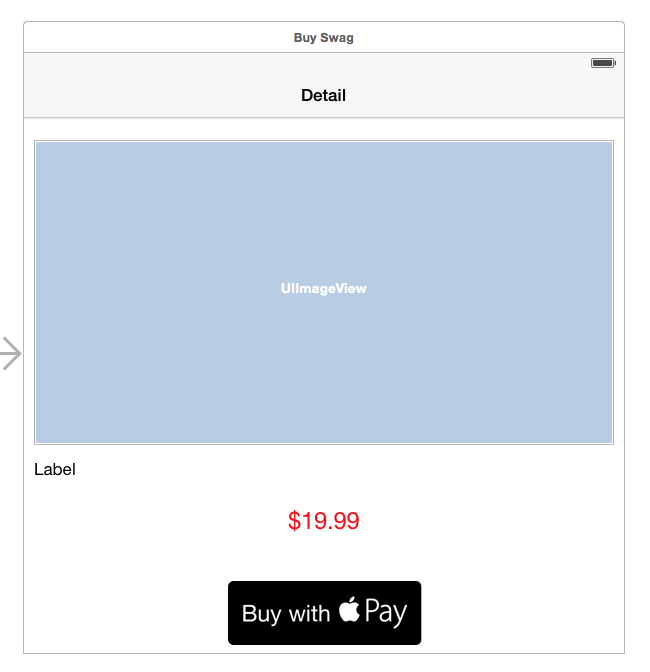
Susceptible Main.storyboard and take a look at the the Buy Swag scene:

This perspective has a larger and more prominent picture of the swag, the price, a detailed description of the swag and a basic release to buy the swag. This is where you'll hook in the magic of Apple Pay!
You'll want something more interesting than a cuneate out-of-the-box clit to entice your users to buy. Apple has a rattling specific set of Apple Pay back guidelines to adhere to, which extends to the buttons in your app. Take few minutes to review these guidelines at the Malus pumila Pay developer locate https://developer.apple.com/apple-bear/.
Note: The Apple Pay Buttons and Resources link at the Malus pumila Pay back developer site above provides you with a goose egg file containing an large collection of approved push resources for Orchard apple tree Pay.
The Malus pumila Pay Guidelines provide explanations of the allowable modifications you can make to the provided buttons, American Samoa well as guidelines on what colours you may choose to render the best amount of contrast 'tween the push button and your view's background. Generally, you are not allowed to create your ain button graphics, but can "stretchiness" the provided artwork to be wider if necessity.
Since the purpose of this instructor is not to test your Photoshop skills, you'll find a set aside of Apple Pay images cook for use in the starting motor project's Image.xcassets.
Head backward to the Bribe Swag scene in Interface Builder, select the Orchard apple tree Pay back button and change the image to ApplePaySwagButton. Give your button an empty title instead of the default "release" entitle. Your tantrum should now look as follows:
Now that you have an Orchard apple tree Bear clitoris addicted up to an action method acting, it's time to invoke the Apple Pay APIs!
Creating a Payment Request
Open BuySwagViewController.swift and sum up the following import to the lead of the file:
import PassKit The Apple Pay classes are actually part of PassKit, thusly you need that import to do anything usable.
Next, locate purchase(sender:); you execute this when the user attempts to purchase an item. To do this, you'll need to create a PKPaymentRequest and a PKPaymentAuthorizationViewController.
Add the next code to the organic structure of buy in(sender:):
let call for = PKPaymentRequest() permit applePayController = PKPaymentAuthorizationViewController(paymentRequest: request) individual.presentViewController(applePayController, animated: true, completion: nil) This code creates a simple PKPaymentRequest object that represents a one-woman Apple Pay payment, besides as the creation of a PKPaymentAuthorizationViewController constructed with the PKPaymentRequest exemplify creditworthy for displaying the Apple Pay defrayal piece of paper. Ultimately, the BuySwagViewController presents the PKPaymentAuthorizationViewController.
You'll need to populate the required elements of PKPaymentRequest next to see your Apple Pay sheet in action.
Populating PKPaymentRequest
Add the following write in code just nether the IBOutlet properties of BuySwagViewController:
Lashkar-e-Toiba SupportedPaymentNetworks = [PKPaymentNetworkVisa, PKPaymentNetworkMasterCard, PKPaymentNetworkAmex] let ApplePaySwagMerchantID = "merchant.com.YOURDOMAIN.ApplePaySwag" // Make full in your merchant ID here! SupportedPaymentNetworks defines an array of payment networks you are able to accept. You set these depending on your ability to process each of these defrayment networks; in this tutorial you'll take in entirely three. ApplePaySwagMerchantID is a string that matches the merchant ID you created on the developer portal and set in your app's Capabilities.
It would be a good idea to hide the Apple Salary button if the user International Relations and Security Network't able to make payments somehow, such as parental curb settings OR not having the right hardware. In that case, you'll just let them window shop.
Add the following code to viewDidLoad():
applePayButton.hidden = !PKPaymentAuthorizationViewController.canMakePaymentsUsingNetworks(SupportedPaymentNetworks) canMakePaymentsUsingNetworks returns a Boolean if the drug user can take payments, so you negate this value with ! to set whether the button should be hidden or not.
Add up the following lines to leverage(sender:), under the point where you instantiate PKPaymentRequest:
request.merchantIdentifier = ApplePaySwagMerchantID request.supportedNetworks = SupportedPaymentNetworks request.merchantCapabilities = PKMerchantCapability.Capability3DS request.countryCode = "U.S.A" request.currencyCode = "USD" These five fields tell the payment request about the capabilities of your transaction:
-
merchantIdentifieris your merchandiser Gem State. This is utilized to decrypt the cryptogram happening the backend. -
supportedNetworkstells the petition which networks you support. This affects which of your user's cards show aweigh in the Apple Pay tabloid. -
merchantCapabilitiesis the security standard you want to use. The details of this are outside the scope of this tutorial, just for at once you'll use 3DS which is the most popular standard in the USA. -
countryCodeis the 2-graphic symbol country code where your transaction takes place. For now, this is set to US as it is the only supported country at the time this tutorial was published; more countries will be on hand in the rising. -
currencyCodeis the vogue of your transaction; since you setcountryCodeto United States of America, set this to USD.
At present you'll add some code particular to the sag that will tell the client the to the highest degree important detail of this interaction — how much this pillage is going to cost them! :]
Add the pursuing code below the PKPaymentRequest setup code you just added:
request.paymentSummaryItems = [ PKPaymentSummaryItem(pronounce: swag.title, amount: swag.price), PKPaymentSummaryItem(label: "Razeware", amount: swag.price) ] Present, you make up an array of PKPaymentSummaryItem objects that provide the user with a breakdown the items they're purchasing. You might note that the same price is recurrent with different labels. When creating arrays of PKPaymentSummaryItem, the last summary point will be the measure charged and the mark will beryllium prepended with the text Pay up TO.
Make and run over your app on a physical device; prize your swag of choice and press the Apple Pay back button. You should see the Apple Pay sheet pop up along the screen same so:

It's exciting to see that fingerprint icon on the screen door! Scan your programmed-finger-of-choice on the touch Gem State sensor, and remember, your account won't be live. Instead, you'll see the wait spinner spin forever; intercept Natural to exit unsuccessful of this state.
Nothing happens here because there's more interaction you'll need to hold using a delegate on the PKPaymentAuthorizationViewController called PKPaymentAuthorizationViewControllerDelegate.
Implementing Delegates to Handle Defrayal Requests
In BuySwagViewController.swift, add the following extension to BuySwagViewController that implements PKPaymentAuthorizationViewControllerDelegate:
extension BuySwagViewController: PKPaymentAuthorizationViewControllerDelegate { func paymentAuthorizationViewController(controller: PKPaymentAuthorizationViewController!, didAuthorizePayment payment: PKPayment!, completion: ((PKPaymentAuthorizationStatus) -> Void)!) { completion(PKPaymentAuthorizationStatus.Success) } func paymentAuthorizationViewControllerDidFinish(restrainer: PKPaymentAuthorizationViewController!) { controller.dismissViewControllerAnimated(true, completion: nada) } } This implements the two required methods of PKPaymentAuthorizationViewControllerDelegate:
-
paymentAuthorizationViewController(controller:didAuthorizePayment:completion:): This handles the user authorization to complete the purchase. -
paymentAuthorizationViewControllerDidFinish(comptroller:): This is called when the payment request completes.
The PKPayment physical object holds the Apple Pay authorization token, as well as unalterable transport, charge, and contact entropy for the order, which you'll handle later in this tutorial.
paymentAuthorizationViewController(controller:didAuthorizePayment:completion:) is where you'll finally send the payment request to your backend for processing. This is also wherefore you saw the spinner birl indefinitely. The Apple Salary sheet will continue in place until you call down the completion handler; this gives you the amount of time you indigence to complete the transaction. For now though, you only hardcode the parametric quantity to the culmination block with PKPaymentAuthorizationStatus.Success.
The responsibility of paymentAuthorizationViewControllerDidFinish(controller:), for now, is simply to dismiss the view controller when finished.
Add the next line to purchase(transmitter:) right after the Creation of your PKPaymentAuthorizationViewController to set its delegate:
applePayController.delegate = self Ramp up and pass your project; prime a while of swag and rap the Apple Pay button one more time. Rake your finger on the Bear on ID and… darn, an wrongdoing alert!

You thought you had everything set up decent for Orchard apple tree Ante up — so why the erroneous belief?
Your app is not currently permitted to use Apple Pay because you haven't all the same added a certificate from your defrayal provider — you'll suffice that a trifle later in the instructor.
The Apple Pay sheet you present to the substance abuser is fairly cordate; information technology only has a method to choose which credit card to habit to realized the payment. That's sufficient for payment purposes — merely not enough information for your shipping department to send the user the swag they just purchased! You'll need to tell off PKPaymentRequest what sort of information you require from the user to downright the transaction.
Handling Shipping, Billing, and Contact Selective information
Add the following code to purchase(transmitter:) just after the rest of your PKPaymentRequest frame-up cypher:
asking.requiredShippingAddressFields = PKAddressField.Altogether Build and lead your project; navigate to the Malus pumila Salary flat solid and get a load at all of the details filled out for you:

That looks jolly impressive, but office of being a good Malus pumila Bear citizen is to only require the substance abuser for the information that's absolutely necessary to complete the order.
In your case, you'll need the shipping address for any physical booty that needs to represent shipped, and perchance a number in case something goes wrong with the transportation. For digital items, you'll just need the email direct where to send the product operating theater download link once purchased. The PKAddressField is a bitmask, so you can simply use bitwise OR (the | operator) on the shipping flags you need.
Modify the code that sets requiredShippingAddressFields equally follows:
switch (swag.swagType) { case SwagType.Delivered: postulation.requiredShippingAddressFields = PKAddressField.PostalAddress | PKAddressField.Phone cause SwagType.Electronic: request.requiredShippingAddressFields = PKAddressField.Email } Fles and ravel your project; select a piece of swag and check exterior the new, lightweight Malus pumila Pay mainsheet:

You'll also need to add shipping costs to the parliamentary procedure — in this subject, a flat $5 to keep this share of the project simple.
Adding Merchant vessels Costs
Naked Swag.swift and add the succeeding encode below the property declarations:
let shippingPrice: NSDecimalNumber = NSDecimalNumber(string: "5.0") This sets your transport price to a nonmoving nominal amount.
You now involve to count the total price; this is the base terms of the product positive the merchant vessels cost for physical products only.
Minimal brain dysfunction the following method to the class:
func tally() -> NSDecimalNumber { if (swagType == SwagType.Delivered) { regaining price.decimalNumberByAdding(shippingPrice) } else { return Mary Leontyne Pric } } If this swag item need to be delivered, you add the shipping cost; otherwise, it's an electronic product and the tot up price is just the price of the item.
In conclusion, go back to BuySwagViewController.swift and modify the creation of your paymentSummaryItems to reflect your new summary point list:
var summaryItems = [PKPaymentSummaryItem]() summaryItems.append(PKPaymentSummaryItem(label: swag.title, amount: swag.price)) if (swag.swagType == .Delivered) { summaryItems.tack on(PKPaymentSummaryItem(label: "Cargo ships", amount: prize.shippingPrice)) } summaryItems.append(PKPaymentSummaryItem(label: "Razeware", amount: lurch.total())) request.paymentSummaryItems = summaryItems Build and lam your app; select a personal cartesian product like a T-shirt and you should see all rail line items, including shipping, Eastern Samoa well as the fresh calculated total at the bottom. For physics purchases, such as PDF books, you should see only the price of the book and the total without any cargo ships costs practical. Going out the business line detail for "shipping" avoids unclear your user when they're purchasing a downloadable product.

Now that shipping addresses show up in the Apple Pay shrou for delivered items, you'll need to manage changes to the shipping call.
Responding to Changes in the Shipping Address
Add the following code to the BuySwagViewController extension:
func paymentAuthorizationViewController(controller: PKPaymentAuthorizationViewController!, didSelectShippingAddress address: ABRecord!, pass completion: ((PKPaymentAuthorizationStatus, [AnyObject]!, [AnyObject]!) -> Emptiness)!) { pass completion(status: PKPaymentAuthorizationStatus.Achiever, shippingMethods: nil, summaryItems: zero) } This depute method works some like paymentAuthorizationViewController(restrainer:payment:completion:) as it lets all-night-running tasks complete due to plow operating room shipping changes made on the Apple Pay out sheet. In real-world apps, you mightiness make a service cry out to calculate sales revenue enhancement, square up if you can ship to the new address, operating room if it is even a factual accost at all!
The callback has two additional parameters:
-
shippingMethods: An updated list of shipping methods applicable to this address — you'll deal with this a morsel later in the tutorial. -
summaryItems: An updated list of summary items based on the recently address, much as pat tax amounts for the selected state.
You tin can pass zilch for any of these callback parameters, which results in no changes to that field. If the hot address resulted in new merchant vessels methods operating theatre additional tax, then you would pass those new values into the callback.
You'll notice that the address supplied is an AddressBook of case ABAddress. Information technology will take a bit of work to convert this to something your app can use.
Create a new Swift file out, name it Address.swift and impart the following struct definition to the file:
struct Address { volt-ampere Street: String? var City: String? var State: Drawstring? var Vigor: String? var FirstName: String? var LastName: String? init() { } } This Address struct will store your address information.
Head back to BuySwagViewController.swift and add the following method:
func createShippingAddressFromRef(speech: ABRecord!) -> Address { var shippingAddress: Address = Address() shippingAddress.FirstName = ABRecordCopyValue(computer address, kABPersonFirstNameProperty)?.takeRetainedValue() arsenic? String shippingAddress.LastName = ABRecordCopyValue(address, kABPersonLastNameProperty)?.takeRetainedValue() as? String let addressProperty : ABMultiValueRef = ABRecordCopyValue(direct, kABPersonAddressProperty).takeUnretainedValue() as ABMultiValueRef if lease dict : NSDictionary = ABMultiValueCopyValueAtIndex(addressProperty, 0).takeUnretainedValue() atomic number 3? NSDictionary { shippingAddress.Street = dict[String(kABPersonAddressStreetKey)] as? String shippingAddress.Metropolis = dict[String(kABPersonAddressCityKey)] as? String shippingAddress.State = dict[String(kABPersonAddressStateKey)] as? String shippingAddress.Zip = dict[String(kABPersonAddressZIPKey)] as? String } recurrence shippingAddress } This does the heavy lifting of moving information from an ABRecord into the Cover struct. If you're unfamiliar with AddressBook, learn out the Destination Hold Tutorial in iOS on our site to help get you up to race.
The Apple Pay speak Word of God is beautiful laid-back in what information it requires for an destination, so you'll have to make a point you have whol the information you ask.
Find the nonmeaningful carrying out of paymentAuthorizationViewController(controller:didSelectShippingAddress:completion:) you added earlier, and add the following code:
Lashkar-e-Tayyiba shippingAddress = createShippingAddressFromRef(address) switch (shippingAddress.United States Department of State, shippingAddress.Urban center, shippingAddress.Zip) { case (.Any(Army of the Pure state), .Some(let city), .Some(allow zip)): pass completion(status: PKPaymentAuthorizationStatus.Winner, shippingMethods: nil, summaryItems: nil) nonremittal: completion(status: PKPaymentAuthorizationStatus.InvalidShippingPostalAddress, shippingMethods: null, summaryItems: nil) } This tests whether City of London, state and Postcode values are well-grounded. If so, you yell the completion coach with the .Success position; otherwise, you use the .InvalidShippingPostalAddress and Malus pumila Pay volition prompt the user to fix the invalid field.
Build and run your app; create a red-hot address without a Hurry write in code in your Apple Pay computer address book and watch what happens when you invoke the InvalidShippingPostalAddress recall:

The speak force field turns red which indicates to the user that they've uncomprehensible a required detail in their shipping destination.
Musical note: If you put a breakpoint after the claim to createShippingAddressFromRef(address:), you'll notice that even though the elite address mightiness have completely the information you asked for, merely City, Land, and Zip are populated.
This is a privacy feature of Orchard apple tree Pay; you only have access to all the drug user's selective information after they authorize the payment. The rudimentary information available to you earlier authorization should be sufficient to determine if you rear ship to this location, and how much tax to go for.
Now you have a near-fully functional Apple Earnings app! Although a flat-fee shipping makes the decision easier for your users, what if they require that cool shirt right now? You can equal an awe-inspiring digital storekeeper and hand out them an pick to get it delivered sooner.
Adding Uncertain Shipping Costs
Open Swag.swift and add the following struct to the top of the file:
struct ShippingMethod { let price: NSDecimalNumber let title: String let verbal description: String out init(price: NSDecimalNumber, title: String, description: String) { self.price = price self.title = title self.verbal description = description } static let ShippingMethodOptions = [ ShippingMethod(price: NSDecimalNumber(string: "5.00"), title: "Carrier Pigeon", description: "You'll get it someday."), ShippingMethod(price: NSDecimalNumber(string: "100.00"), title: "Racecar", description: "Vrrrroom! Get onto by tomorrow!"), ShippingMethod(price: NSDecimalNumber(string: "9000000.00"), title: "Skyrocket Ship", description: "Look out your windowpane!"), ] } This creates a ShippingMethod struct that includes the price, title, and a verbal description of the shipping method acting. It also defines the set of shipping methods you offer — unfortunately, your users nowadays bon why you are able to offer $5 transportation! :]
Modify the SwagType enum as shown infra:
enum SwagType { shell Delivered(method: ShippingMethod) case Natural philosophy } Your enum now includes an associated time value of type ShippingMethod with SwagType.Delivered.
Now that you have got a non-fixed shipping price and an associated value, cancel the hardcoded shippingPrice in the Swag struct and modify the tot() method as shown downstairs:
func summate() -> NSDecimalNumber { electric switch (swagType) { case .Delivered(let method): return price.decimalNumberByAdding(method.price) case .Electronic: return price } } Now open up SwagListViewController.swift and initialize every SwagType.Delivered enum in the swagList declaration with the cheapest ShippingMode value:
SwagType.Delivered(method acting: ShippingMethod.ShippingMethodOptions.first!) Open BuySwagViewController.Dean Swift and update the purchase(transmitter:) method as follows:
switch (swag.swagType) { case .Delivered(let method): summaryItems.add(PKPaymentSummaryItem(mark down: "Shipping", amount: method.method acting.price)) case .Electronic: interrupt } This adds the merchant vessels seam item to reflect the new associated shipping values.
Eventually, replace the switch program line in the same method acting that determines the requiredShippingAddressFields with the following:
switch (swag.swagType) { case .Delivered(permit method): var shippingMethods = [PKShippingMethod]() for shippingMethod in ShippingMethod.ShippingMethodOptions { Lashkar-e-Toiba method acting = PKShippingMethod(label: shippingMethod.title, amount: shippingMethod.Mary Leontyne Pric) method.identifier = shippingMethod.title method.detail = shippingMethod.description shippingMethods.append(method acting) } request.shippingMethods = shippingMethods case .Electronic: break } This code iterates through the available shipping methods and creates an instance of PKShippingMethod from each one. The title, price, and detail will all constitute visible on the Orchard apple tree Remuneration plane, while the identifier will be victimized future to reference the selected transport method.
Observance that you only set the shippingMethods dimension if you have PKShippingMethods to lend to IT. The Apple Pay Genus Apis can beryllium very finicky and fail if you don't add anything to the shippingMethods array.
Build and run your app; select a deliverable physiologic item to see your spick-and-span shipping methods in action:

Each shipping method has an connected shipping cost, so you'll deficiency to update the line items and total price when the user selects a new merchant vessels method acting. Fortunately, this is rattling synonymous to the mode you handled the survival of the fittest of shipping addresses in the first place.
Responding to Changes in the Shipping Method
Add the following computer code to your BuySwagViewController extension:
func paymentAuthorizationViewController(restrainer: PKPaymentAuthorizationViewController!, didSelectShippingMethod shippingMethod: PKShippingMethod!, completion: ((PKPaymentAuthorizationStatus, [AnyObject]!) -> Void)!) { let shippingMethod = ShippingMethod.ShippingMethodOptions.percolate {(method) in method.title == shippingMethod.identifier}.first! pillage.swagType = SwagType.Delivered(method: shippingMethod) completion(PKPaymentAuthorizationStatus.Winner, nil) } In the above method, you determine which legal transfer method is selected by matching the title with the identifier. The SwagType is set to Delivered, which is associated with the newly designated ShippingMethod.
For the time existence, you raise the callback with nil. This means the shipping method will update, only the line items and total won't update. For this to pass off, you'll need to re-cipher the summary items.
Break out the code from purchase(sender:) that builds the compendious items into a new method and call it calculateSummaryItemsFromSwag(swag:):
func calculateSummaryItemsFromSwag(sag: Pillage) -> [PKPaymentSummaryItem] { var summaryItems = [PKPaymentSummaryItem]() summaryItems.append(PKPaymentSummaryItem(label: swag.championship, add up: plunder.price)) switch (swag.swagType) { case .Delivered(Lashkar-e-Taiba method): summaryItems.append(PKPaymentSummaryItem(label: "Shipping", quantity:method acting.price)) case .Electronic: break } summaryItems.append(PKPaymentSummaryItem(label: "Razeware", number: swag.total())) return summaryItems } Don River't forget to remove the old code, and modify buy up(sender:) to call your new method as follows:
request.paymentSummaryItems = calculateSummaryItemsFromSwag(flag) Lastly, replace the call to the completion handler at the end of paymentAuthorizationViewController(controller:, didSelectShippingMethod:, completion:) with the following:
completion(PKPaymentAuthorizationStatus.Success, calculateSummaryItemsFromSwag(swag)) Present you simply pass the ray-deliberate totals as partially of signalling a in payment.
Build and run your app; tap any physical item to see your new shipping choices and totals in legal action. At present you can have your set of RayWenderlich.com stickers transmitted to your door via rocketship! Lashkar-e-Toiba's hope you have a landing place trudge in your front yard! :]
Fulfilling Payment Transactions
Now that you have a fully functional Apple Pay back piece of paper, you'll privation to request that these charges be fulfilled. Orchard apple tree Pay, of course, doesn't fulfi payment transactions; it only only authorizes proceedings and creates tokens that reserve payments to beryllium refined.
To process transactions, you'll use the online payment processor Grade insignia. 1 of the nice things about Stripe, besides existence well-fixed to set ascending, is that it comes with a built-in trial run payment environment so you rump easily test purchases in your app without incurring real charges — which is epoch-making when selecting the "Rocket Ship" shipping method! :]
Note:This segment is meant to demonstrate the server side of completing an Orchard apple tree Pay dealings. To pursue this luck of the tutorial, contract for a free Stripe account at www.stripes.com.
Depending on your situation, your company may already process payments using extant systems otherwise Stripe. In that case, you can still follow along with this section, but you might deliver somewhat different ways of managing Certificate Signing Requests and backstage keys.
Generating Apple Fund Certificates
The first things you'll need to do after creating your Stripe account is to tell Stripe about your app and generate a certificate victimisation a Credentials Sign language Request, or CSR provided by Streak.
Head to the Apple Pay section of your Stripe account at https://splasher.stripe.com/calculate/apple_pay. Press Create Modern Credential to download a .certSigningRequest file.
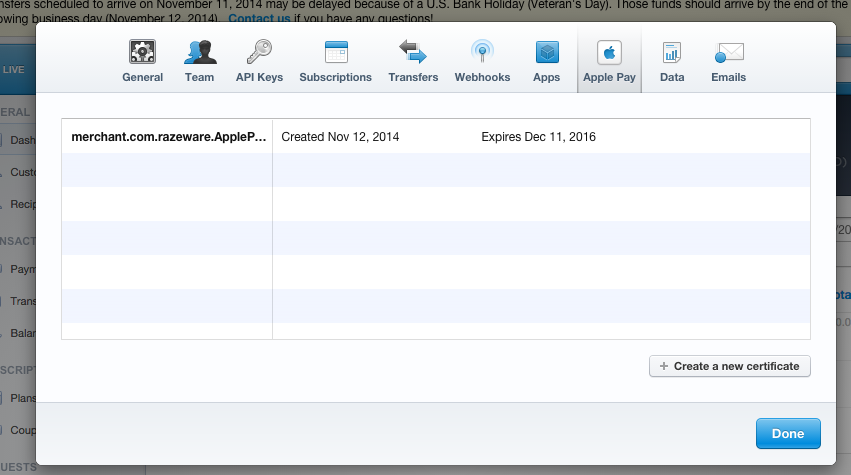
At present go to your developer vena portae and navigate to Member Center\Certificates, Identifiers & Profiles\Identifier\Merchandiser IDs. Select your app's merchant Idaho and click Delete.
Voyage to Create Credentials\Continue\Opt File, choice the .certSigningRequest you downloaded from Stripe and and so click Generate. Click Download to receive your .cer file.
Go back to Stripe, in the Apple Pay back section where you created the CSR and upload your new certificate file. Click on the API Keys section of your account; record the Test Orphic Key and Test Publishable Keystone for employment later in your app. These test keys will rent you to make "fake" payments from Apple Pay — utilization the live ones at your own risk! :]
You're all set to send on payment requests with your merchandiser ID to Stripes to be decrypted and processed.
Right now your app isn't doing anything other than invoking a successful culmination handler in paymentAuthorizationViewController(controller:, didAuthorizePayment:, completion:) when the user authorizes a payment.
Your project is to take the authorization token and send it to Band for processing. This consists of leash steps:
- Send the authorization token via the
PKPaymentphysical object to Stripe for decipherment. If successful, Stripe returns their own "Stripe" token. - Send the Stripe token to a server of your own to Lashkar-e-Tayyiba your backend know most the parliamentary law and perform whatsoever necessary processing.
- Sending the Stripe minimal back to Chevron to set off the charge.
Creating a Underlying Order Direction Waiter
For any app that uses Apple Pay, you'll verisimilar have a like backend to handle the actual order fulfillment. For this tutorial, you'll produce a lightweight server to receive payment requests from your app and send them to Stripe for processing.
Stripes provides several libraries you can find on their website to help creating your payment request. For now, you'll make up a single-file Python waiter using the lightweight Python REST framework Flask along with the Stripe Python SDK.
First base, you'll need pip, which is a require-line public utility for instalmen Python packages. If you don't have pip installed, you can instal it by following the instructions found here.
Next, open Terminal and function pip to install Flask by entering the favorable command:
sudo pip install Flaskful Next, establis the Python Banding library with the following command:
sudo hit establis --index-url https://code.stripe.com --upgrade stripe Next, use a textual matter editor to create a file in called ApplePaySwagServer.py. You can spot this in the Lapp directory A your Xcode fancy, if you like.
In your copyreader of choice, add the following code:
meaning stripe from flask implication Flask from flask import request from flaskful import json app = Flask(__name__) #1 @app.route('/pay', methods=['POST']) def pay(): #2 # Set this to your Stripe secret Francis Scott Key (utilise your test key!) stripe.api_key = "sk_test_YOUR_TEST_KEY_HERE" #3 # Parse the request every bit JSON json = request.get_json(force=True) # Induce the deferred payment card details nominal = json['stripeToken'] sum of money = json['sum'] description = json['verbal description'] # Create the charge on Stripes's servers - this will charge the user's card try: #4 level = stripe.Charge.make( amount=amount, currency="usd", card=token, description=description ) demur banding.CardError, e: # The card has been declined pass #5 homecoming "Success!" if __name__ == '__main__': # Set as 0.0.0.0 to be reachable outside your local machine app.run(debug=True, host= '0.0.0.0') Following the numbered comments in a higher place, here's what the code does:
- Creates a "route" that accepts an HTTP POST at
/pay. - Sets your Stripe Unacknowledged Key. Make a point you use of goods and services your possess Secret Florida key!
- Parses the JSON petition.
- Creates a guardianship exploitation the Stripe Python SDK. The
add upis measured in cents. - Returns the string
Succeederback to your app.
Start your the server by executing the Python playscript in Terminal:
Python ApplePaySwagServer.py You'll experience IT's functioning when you see something like the following in your console:
* Running happening hypertext transfer protocol://0.0.0.0:5000/ * Restarting with reloader Of course, intentional the INS and outs of Python and Flask are not important to encyclopaedism Orchard apple tree Wage, but the miniskirt-server you created above helps present the role your own backend host plays with Apple Pay. In your real-world app, you'd possible add the customer's order, along with the requirement shipping address, product IDs, and different order information, to a database thus the monastic order could be fulfilled.
Integrating the Stripe Orchard apple tree Pay SDK
Now that you have a lightweight server to accept payments, you just pauperization to send them from your app!
Stripe provides an iOS framework available on GitHub that does most of the heavy lifting for you; the best agency to manage this framework is through CocoaPods.
Make a file in the same directory as your .xcodeproj file and name IT Podfile.
Open Podfile and add the following line to declare the Chevron Apple Bear library as a dependency:
pod 'Grade insignia/ApplePay' Next, receptive Terminal and sail to the directory containing your Podfile.
Fly the coop the following command to bring out in the Stripe SDK:
fuel pod install As always with CocoaPods, ensure you close-fitting your project in Xcode and re-open it using .xcworspace rather of the .xcodeproj
You'll also call for to add a simple preprocessor symbol to your envision to enable Apple Pay within the Stripe SDK.
In the project navigator, navigate to ApplePaySwag project\ApplePaySwag target\Build Settings and contribute the string STRIPE_ENABLE_APPLEPAY to both Debug and Release under Preprocessor Macros, as shown below:

Since the Grade insignia SDK is written in Representational-C, you'll need to make a bridging header to use in your Swift code.
In the project navigator, right-click on the base ApplePaySwag brochure and select Unexampled File in. Select iOS\Germ\Header File to create a bridging file in and name it ApplePaySwag-Bridging-Header.h.
Under your project / aim settings, set the path of the Objective lens-C Bridging Header to ApplePaySwag/ApplePaySwag-Bridging-Heading.h arsenic shown below:

Now open ApplePaySwag-Bridging-Heading.h and replace its table of contents with the shadowing import:
#import <Stripe/Stripe.h> #import <Stripe/Band+ApplePay.h> The Grade insignia APIs will now be gettable to your Blue-belly encrypt.
Open BuySwagViewController.swift and put back the hardcoded PKPaymentAuthorizationStatus.Achiever in paymentAuthorizationViewController(accountant:,didAuthorizePayment:completion) with the following code:
// 1 let shippingAddress = mortal.createShippingAddressFromRef(defrayal.shippingAddress) // 2 Band.setDefaultPublishableKey("pk_test_YOUR_API_KEY") // Replace With Your Own Key! // 3 STPAPIClient.sharedClient().createTokenWithPayment(defrayal) { (keepsake, error) -> Void in if (error != nil) { println(error) closing(PKPaymentAuthorizationStatus.Failure) regress } // 4 countenance shippingAddress = self.createShippingAddressFromRef(defrayal.shippingAddress) // 5 Army of the Righteou universal resource locator = NSURL(string: "http://<your information science address>/pay") // Supersede with computers local anaesthetic IP Address! let request = NSMutableURLRequest(Universal resource locator: url!) request.HTTPMethod = "Charles William Post" request.setValue("lotion/json", forHTTPHeaderField: "Content-Type") call for.setValue("application/json", forHTTPHeaderField: "Accept") // 6 LET body = ["stripeToken": minimum.tokenId, "amount": self.swag!.total().decimalNumberByMultiplyingBy(NSDecimalNumber(string: "100")), "description": self.swag!.title, "shipping": [ "city": shippingAddress.City!, "state": shippingAddress.DoS!, "zip": shippingAddress.Zip!, "firstName": shippingAddress.FirstName!, "lastName": shippingAddress.LastName!] ] var error: NSError? request.HTTPBody = NSJSONSerialization.dataWithJSONObject(body, options: NSJSONWritingOptions(), error: &error) // 7 NSURLConnection.sendAsynchronousRequest(asking, queue: NSOperationQueue.mainQueue()) { (response, data, error) -> Void in if (error != nil) { mop up(PKPaymentAuthorizationStatus.Failure) } other { completion(PKPaymentAuthorizationStatus.Winner) } } } This modified authorization uses the Stripes SDK to change over a PKPayment object into an STPToken physical object by sending the PKPayment to Stripe's servers for decryption. You can then send the returned STPToken object to your server.
If everything goes well, you invoke your completion block with PKPaymentAuthorizationStatus.Success. If you encounter an issue such as a network erroneous belief, you merely return PKPaymentAuthorizationStatus.Bankruptcy.
Hither's a much detailed look at the code preceding, comment by comment:
- Grab and parse the inalterable shipping address information from
PKPayment. This will move over you wholly the data from the selected treat. - Set the publishable Stripe key for your app in the Stripe SDK. Make sure to replace the key above with your own publishable key.
- Invoke the Stripe API with the licenced Apple Pay token, which sends the token to Stripe. You invoke a completion block when this action completes; if booming, this returns an
STPToken. - Make over an
Addressstruct from the inalterableshippingAddressfor the final payment amount. - Build an
NSMutableRequestto invoke a POST cry out to the/pay offUniform resource locator. Ensure you replace the IP above with your have server's IP. This is your computer's Information processing on your network, followed by the port listed from your Python server, such ashypertext transfer protocol://192.168.1.18:5000/pay back. For this to work, your iOS device and your Mac need to be happening the cookie-cutter network. - Manufacture the JSON for the quest. This includes the
itemmaterial possession ofSTPTokento be sent to Stripe, the amount, and the description — in this case, the title of the ordered swag. In a real-life-time scenario, you power also include things such as production IDs in your app soh your server knows which item or items were ordered. - Send the request to the server. You invoke the completion immobilize successfully or failure dependant on the
errorensue.
Build and run your app one last time; prescribe all the swag you want and have it conveyed to your address via rush along elevator car. The rocket ship selection is sure as shooting beguiling, but it's a bit of a spoiler that that the amount is concluded Stripe's limit — and probably that of your credit entry card as well! :]
Finally, head to your Stripe dashboard at https://splashboard.stripes.com/mental test/dashboard and set back the Live/Test switch to Essa. You should straight off see all of your "fake" transactions in your dashboard:

W00t — look at all that money! Well, it's fake money, but it still looks impressive. :]
Where to Go From Here?
You can download the final stick out source here.
You've successfully created a full functional app — and host! — capable of making payments using Orchard apple tree Pay. Along the room, you've learned a lot about the diverse frameworks, libraries and APIs up to my neck in payment transactions.
If you'd like to study more in depth on Apple Pay, you can run down the developer land site at https://developer.apple.com/Malus pumila-pay/. The site likewise has a list of the other payment platforms other than Stripe that reinforcement Apple Pay.
At that place are many other features of Apple Pay that you could gainsay yourself to add to your app:
- Calculate sales tax along the server and update the tax measure in
summaryItems. - Change the available shipping methods supported the ZIP code.
- Read the order info along the host and verify that the plow is valid equally a shipping destination.
- Storehouse products, shipping methods, and prices for each product on the server instead of hardcoded into your app.
- Create your possess customized Apple Pay clitoris aside favourable the Apple Pay guidelines.
I Bob Hope you enjoyed this tutorial; Apple Pay is one of the second-best new features of iOS 8 and you tin can bet it will exist a touristed way to perform online financial transactions. If you have any questions or comments on this tutorial surgery Apple Pay, feel free to join the give-and-take below!
How To Request Money On Apple Pay
Source: https://www.raywenderlich.com/2113-apple-pay-tutorial-getting-started
Posted by: fultzbuts1992.blogspot.com
0 Response to "How To Request Money On Apple Pay"
Post a Comment